"you always TIG weld using the minimum power"
How true this is generally I cannot say. However, when starting welding practicing on thin sheet metal, say 1.5mm thick, it's a very good rule. In the absence of any other information about the metals, their thickness and so on, the minimum current which will just sustain a melt pool is a good starting point. TIG welding is penetrative - getting that penetration is much in the technique and only secondarily on the power input. The following advice doesn't make much sense without applying this rule.
Let the machine look after your power control. You could rephrase that as "let the machine look after you". If the machine has a foot-control for the power, set the current control on the machine to give exactly the power you need, so you "floor" the pedal to get the current you want for your steady run.
Most TIG welders in technical colleges and the like are good machines and would be excruciatingly expensive to buy. They come with a foot-operated power control, which looks like and operates like the accelerator pedal of a car. As a beginner, if you try to "drive" on the foot-control, you will be all over the place and never get to see a good condition. You will occasionally see a fleeting bit of good weld when you inspect what you have done, but have not known it was going to happen, don't know after the fact why it happened, and so on so on.
Two things make this so:
If you show the instructor a weld where you did your best and held constant conditions for the length of the weld, the instructor can tell you what you need to do next to try to get to a good weld. This may or may not include a different power control setting.
Imagine how little your instructor can help you if your conditions are all over the place!
I have been practicing on mild steel because it is cheaper than stainless steel and the skills needed are just about the same.
stainless steel is reckoned to need about the same
skills as TIG welding mild steel. However, you have bigger problems
with distortion because of the thermal properties of austenitic
stainless steel. These include the chrome-nickel "18/8" and "18/10's"
from which kettles, pans and the like are made.
(i) thermal conductivity is about half that of ferritic steel, so heat
spreads less far and there are steeper thermal gradients near the
joint
(ii) the thermal expansion coefficient is higher than for ferritic
steel.
You really strongly see these effects, but overall, at the beginner
stage, there don't seem to be many other differences.
aluminium TIG welding looks and sounds very different, but didn't defeat me on a first try. You get a much bigger melt pool, and the AC power to the arc needed for cleaning off refractory aluminium oxides makes the arc crackle, unlike the quiet DC arc for welding steels. The large melt pool kind of reminds me of fairy-tale pictures of the moon reflecting in pools in the woods, the pool being the aluminium melt pool and the moon being the reflection of the tungsten electrode in it.
This is a series where my welding got better.
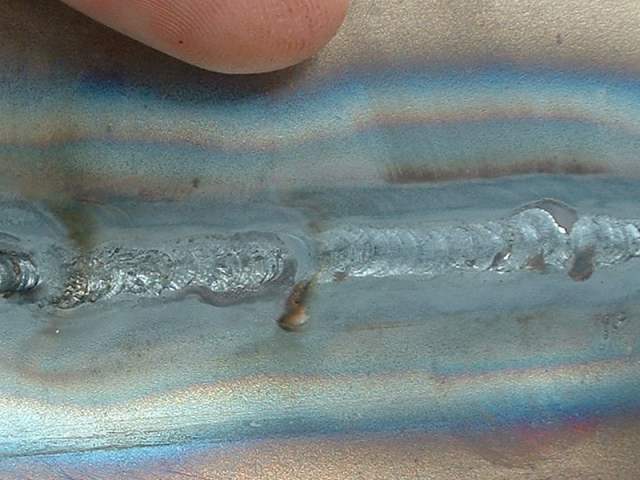
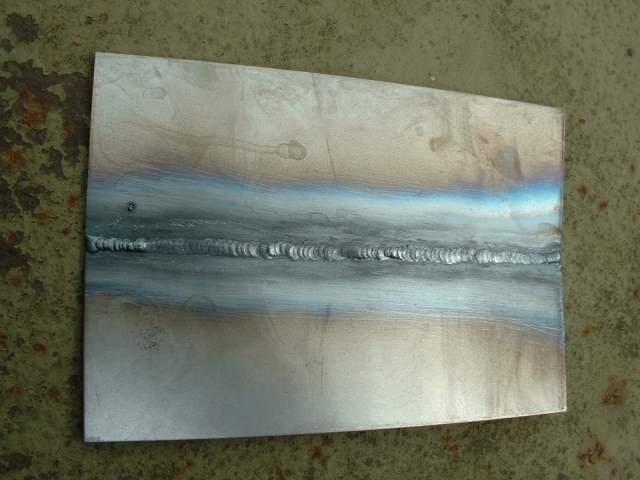
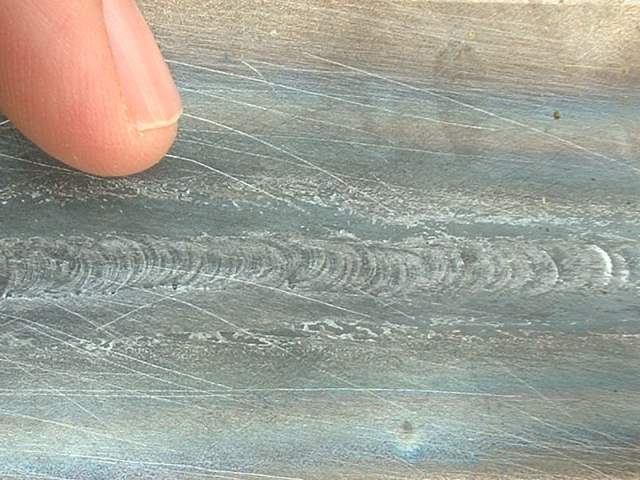
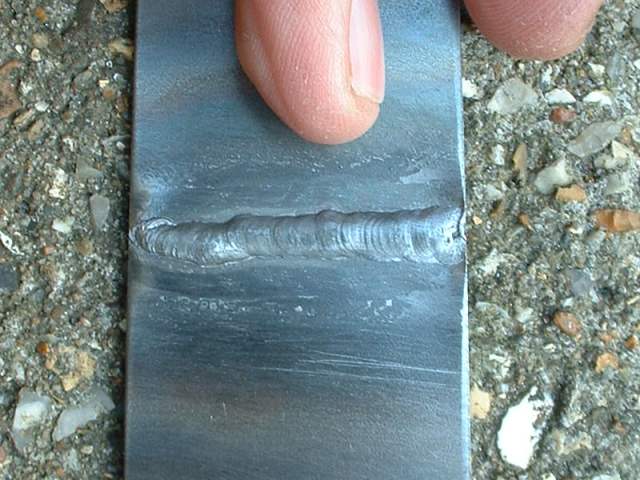
Here I have got constant conditions and the top of the weld seems good
but there is lack of penetration. Looking at the underside, the weld does not fill to the thickness of the sheet. It doesn't show brilliantly well in the photo, but there are "cavities" and/or a continuous incomplete penetration "channel" all along the length of the weld. Basically what you are looking at here is a concave curvature.
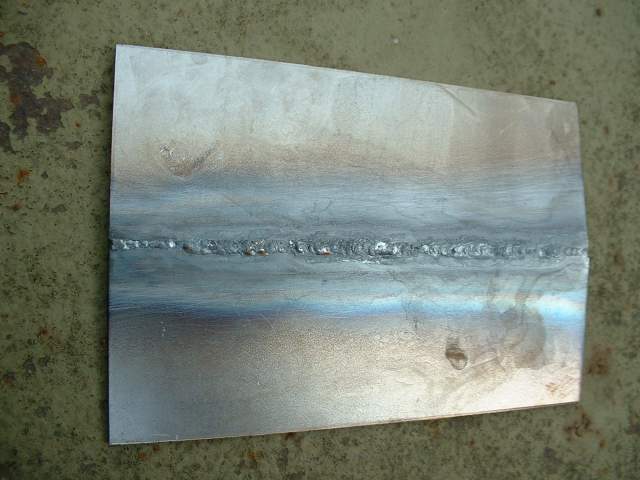
Where I got to next. I didn't know exactly what was going on in the previous pieces. It appears to be not "lack of penetration" in the normal sense of not melting through the thickness of the weld. Anyway, to try to counteract this apparent lack of metal to fill through to full-thickness, I try providing as much filler from the filler wire as I possibly can. The limit proves to be that the weld bead can only get to so much height, as gravity flows the molten weld pool "downhill" and onwards up the weld, in the direction you are trying to weld. Here is what you get...
and the underside where there is now a weld which is the full thickness of the metal.
At this stage I went to see the instructor. He said "you need to be using the arc to "push" the weld along the joint".
So here is what I got. Remembering that the torch has to be held normal / perpendicular to the metal surface to maximise weld penetration, I tried to "lead" the weld by moving the torch ahead.
The result is better...
and the underside is kind-of OK, though it clearly lacks a lot in smoothness and consistency
At this stage I play around fast-and-loose with some scrap, and the "fast" part reveals itself to present an interesting avenue ahead...
I'd seen something like this fleetingly pass by for the a couple of instances of about 10mm length when first trying TIG, using the foot-pedal power control. I had no idea how these oases of aesthetic satisfaction came to exist abruptly amongst the expanse of desolate ineptitude which surrounded them.
Here is what I got this time. The bit of interest is about 30mm long.
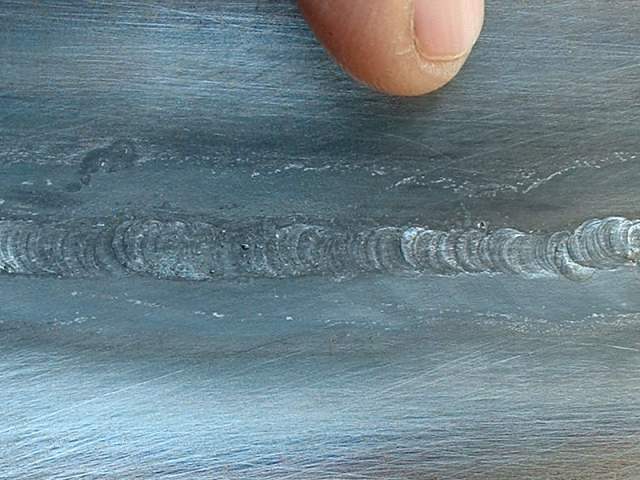
and the underside is as well-formed as the top of the weld
I found these conditions by "enhanced chance", chasing-down on the conditions learned so far. As the set-up was with bits of warped scrap, the gap between the sheet metal and its "fit" in meeting at the same level was wavering, so I lost these conditions outside of this area photographed. However, they kept returning here and there as I continued up the weld. So I was on to something consistent.
What I discovered was a return to something like "keyholing". You get this in various forms of welding. When arc welding (MMA, SMA, SMAW) a butt joint when doing the root run, this first run is supposed to melt through the plates and give a full-thickness penetration and weld joint. You can get and control on a very pronounce cylindrical hole through which the arc blows through the root gap. Around this melted metal of the plates and the welding rod flow by surface tension to fill behind the arc, creating the through-thickness height of weld metal, which advances in a vertical wall along the weld joint as the back face of the "keyhole". When oxy-acetylene welding a butt-joint you can also get a "keyhole", which you can deliberately set-out to create as you will guarantee full-thickness penetration, at the expense of operator concentration in more finely controlling the supply of filler metal from the filler wire in order not to fill the keyhole out of existence.
In this case, as I speeded-up the advance forward, I saw the the melting edge of the sheets of metal formed a very small "notch" dipping slightly into the leading edge of the otherwise round weld-pool. Depth-wise, it falls-away to the weld-root, as much as you can see down this tiny feature. To the best of my ability to sketch using simple tools, what you see is a bit like this:
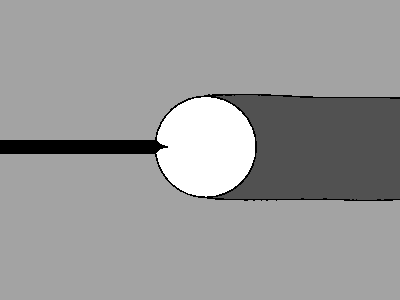
representing a weld moving right to left, where the sheet steel is the gray area, the weld bead is the darker gray trailing, the weld pool is represented in white and the gap between the plates is black.
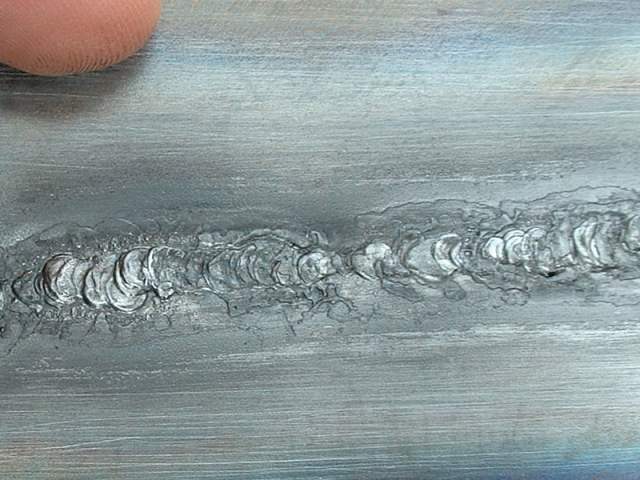
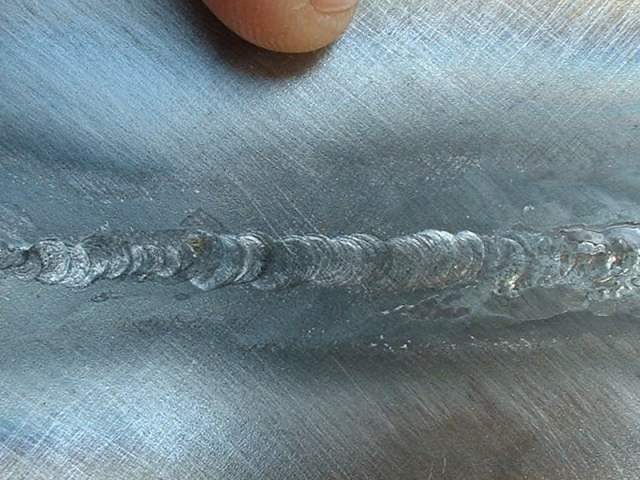
I tried to control on this, and the weld you see is the outcome in this circumstance.
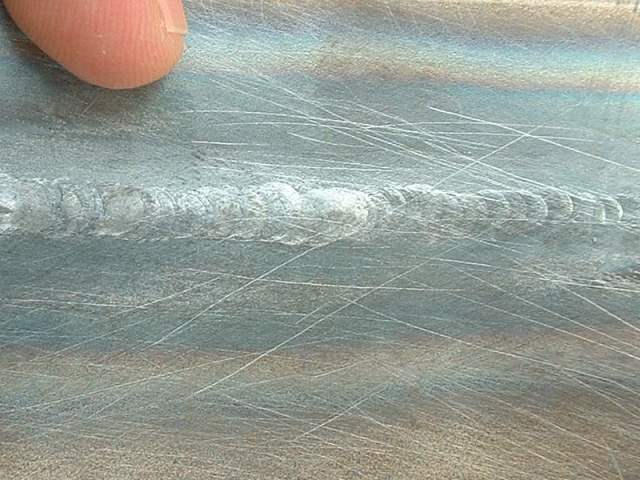
As you can see, the weld is beautifully smooth and has a very low rise above the thickness of the sheet. So full strength would be expected and there are no abrupt changes in thickness. Also, the weld is not scaled. It has clearly spent a minimal time at high temperature. This would be expected to result in a tough weld and a minimum of reduction in the toughness of the sheet metal near the weld.
This looks immensely promising. The session ended at this point. I hope I am onto something.
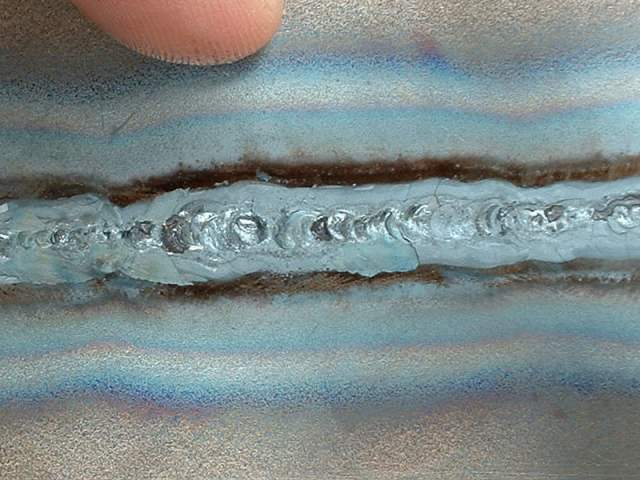
Controlling on this slight notch in the weld-direction side of the weld pool gives repeatable good results. I was reproducibly able to make weld after weld like this:
The top surface
and undersurface
The top bead now could do with a tiny bit more fill, as it is very level erring on slightly concave. So now I need to systematically slightly increase the amount of fill while adjusting to retain the other good conditions.
When I did this weld, I had upped the welding current very slightly above the absolute minimum which formed a weld pool. While holding an arc, the instructor read-off 42Amps current flow on the welder display panel, in welding this 1.5mm thick mild-steel sheet. My instructor told me that a very slightly higher current would be recommended for this thickness of sheet steel. So I had just about found the recommended conditions on observation alone. I was using a 1mm diameter filler wire, which seemed optimum.
Appearance of the weld pool when proceeding with these conditions is clean, flat (no bubbling or other reactions), no obvious swirling (the current is quite low, so cannot be a source of much propulsion), plus there is another observation. It is as if the weld pool metal were a little bit viscous. It "hangs" around the dipped filler rod, which would really be surface tension(?). Presumably with no disruptions and a low temperature, plus an unimpeded line of sight, you do see surface tension at its most effective.
Regarding my idea that at the correct welding conditions there will be this "notch" at the leading edge of the weld pool, at least in this circumstance of welding thinner sheet metal:
"I have observed the notch you speak of, but it's visibility is affected by the type of base metal, thickness, amperage, and shielding gas, so I wouldn't necessarily try to base my technique on it."
So it's been a plan to get me this far, but the path continues...
When learning welding, they happen. Things see to be going brilliantly then, suddenly, you have an entire session where you can't produce one good weld. You've "lost it". Where you where following a technique, you are now doing something wrong and it throws everything.
I'm just trying to get out of one of these (mid-October). I should show you photos of what I ended-up with, but you can understand I threw them in the scrap skip.
What I ended-up with was badly-incinerated pieces with a concave trough instead of underbead. Clearly, whatever I was doing, the "notch" idea was incidental or several layers down in importance.
I headed the page with a rule, which was that with TIG welding you weld with the minimum power which allows you to run the weld (about which I couldn't say how universally true this was). So I went back to this "rule". I had tried "an Amp per thousandth-inch of thickness", so for 1.5mm thick sheet you would be using 60Amps. Well, when I tried that, I had to run so fast that the weld pool was a huge trailing "teardrop" or "comet-tail" shape, instead of the familiar round pool of TIG welding. Don't know what the explanation is here.
I looked for the "minimum power" setting. I turned-down the current on the welding set, started the arc and held the torch steady over one place on the sheet, then reached to the current control and turned it up until I just formed a melt pool. In a few seconds, accumulating heat made this pool grow to about 6mm diameter. So I kept this setting and set-out to weld.
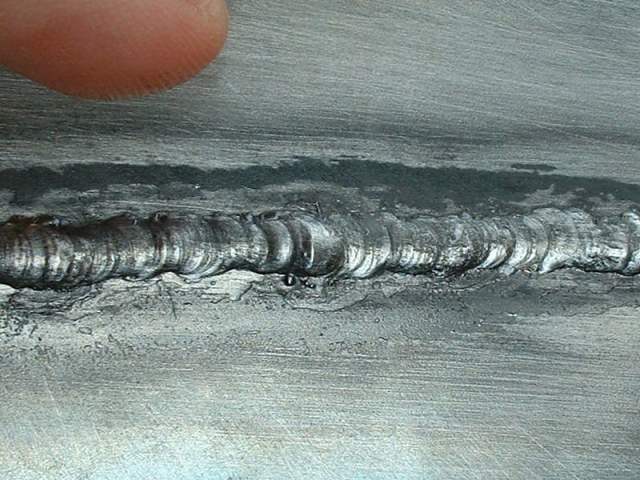
I concentrated on a nice round pool, kept it well-fed with filler-metal, ran at a balance of speed and filler wire supply which kept a constant weld pool diameter - and here is the weld I got:
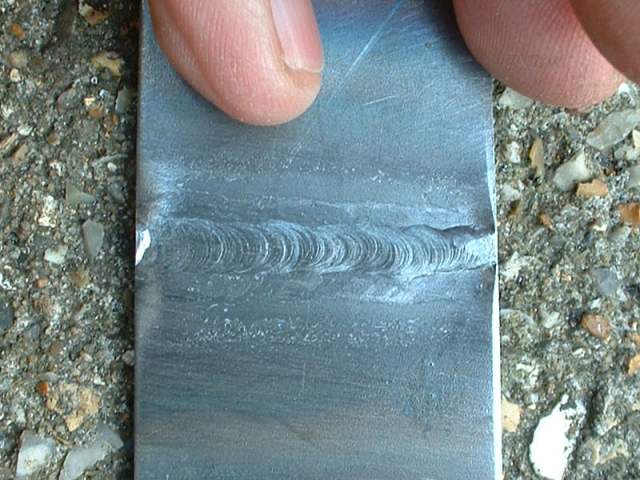
It's a bit over-filled, with a slightly excessive underbead. This section was chopped out of a larger weld where most was not as good. However, if I can replicate this section here, there would be hope for me yet...
The session ended at this point. The instructor had been around, showing me and the guy studying in the booth next to me his version of a TIG weld. He left us with the advice that like all welding, TIG welding is about control of your weld pool.
(Richard Smith, Oct 2003)