This is a machine part.
Weld information:
The samples were quickly macro-etched in the workshop. Saw out a sliver of the cross-section, file, draw-file, emery cloth coarse, emery cloth fine, then etch.
I use Iodine etchant. Which gives a noticeably less sharp etch that acid etchants - but is safe for general use. Used carelessly it stains skin a vivid brown which is intolerably socially embarrassing, long before any physical harm is done.
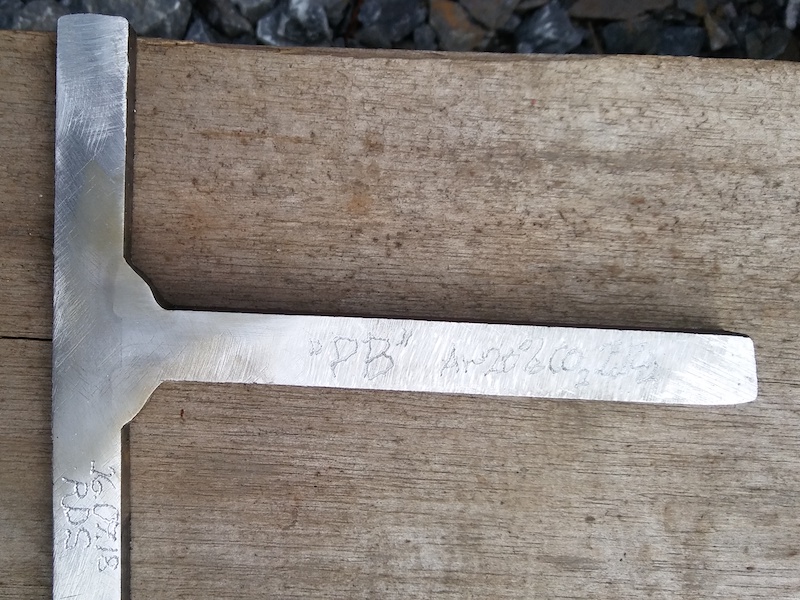
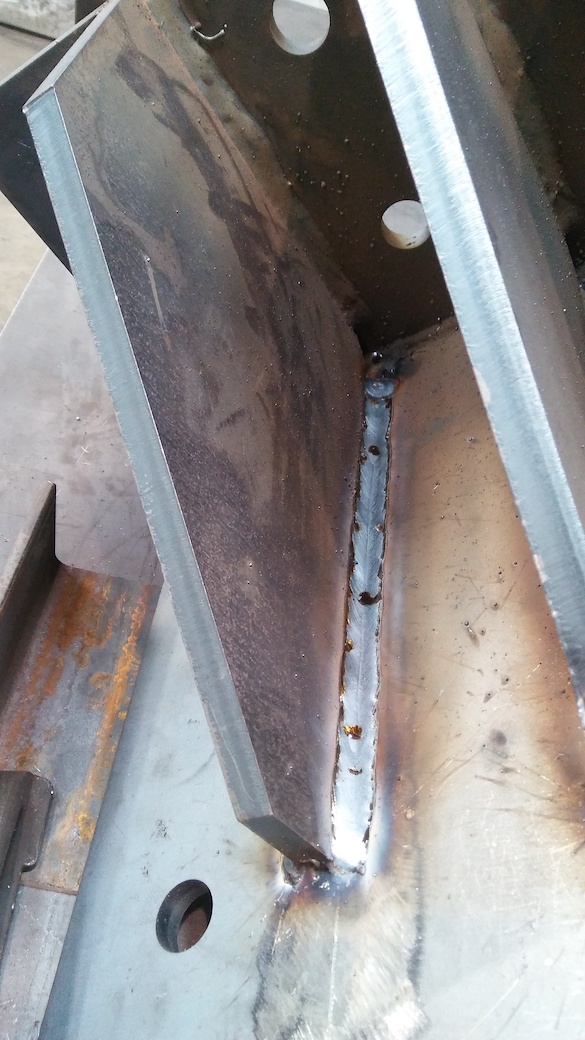
I found I could "MIG" a very satisfactory 8mm leg-length fillet in the PB - horizontal-vertical - position.
However; the torch angle - tilt and slope - are very critical, with satisfactory result only if those angles are in a very narrow optimum.
This was not achievable for the production welds on the 3-gusset right-angle-bracket, because there is constricted space between the 3 close gusset plates. With the right-angle-bracket sat on the bench, the necessary torch angles for a "PB" 8mm fillet are prevented by the adjacent gusset-plates.
For a T-fillet-weld, the PA orientation is when the "continuing" and "terminating" plates are on the 45degree orientations, while for the weld the torch is upright.
This result is excellent.
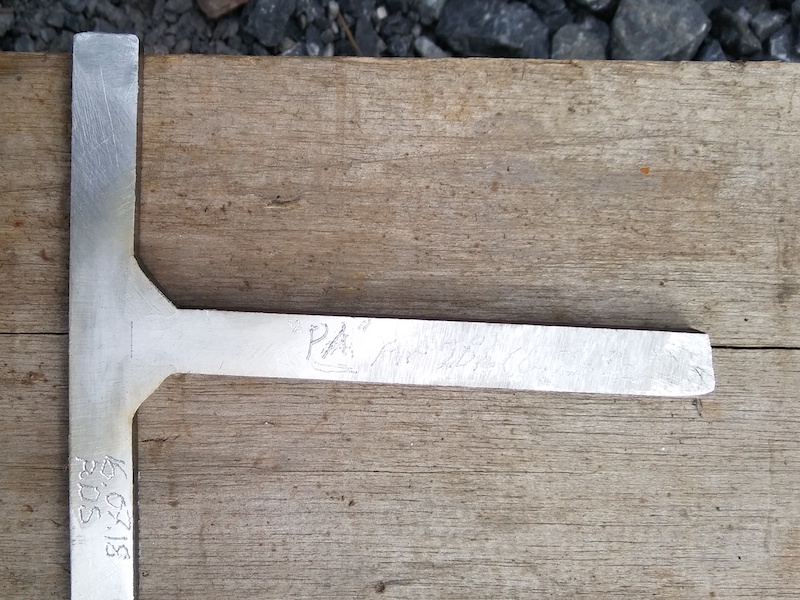
With the right-angle-bracket presented on the 45degree orientation
(seen imminently), the torch is forced to a tilt which is not
vertical, by the closely adjacent gusset-plate.
However, that is not a problem because a weld in the "PA" orientation
has a very broad range of conditions for an optimal outcome. The
achievable torch angles fall well within the "PA-optimal" range.
As just explained, a robust welding condition with a big domain of stability is achieved by tilting the right-angle-bracket at 45degrees and doing the 8mm leg-length fillets in the "PA" position.
Hence, a 45degree fixture / jig was made.
"Opposite" 45degrees needed to do both sides of the double-sided fillet-welds.
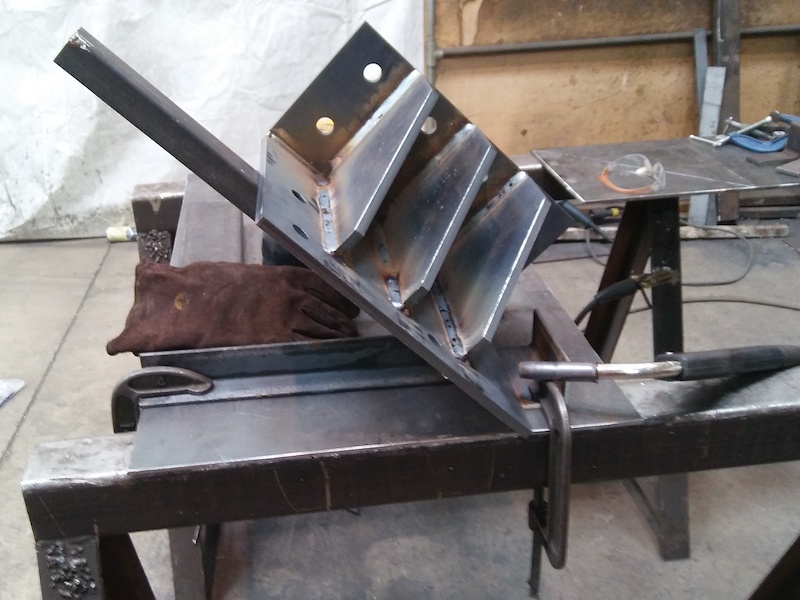
Pleasing outcome.
I "back-to-backed" two right-angle-brackets after fitting-up but before
welding. Using nuts-and-bolts with washers through the
for-application bolt holes.
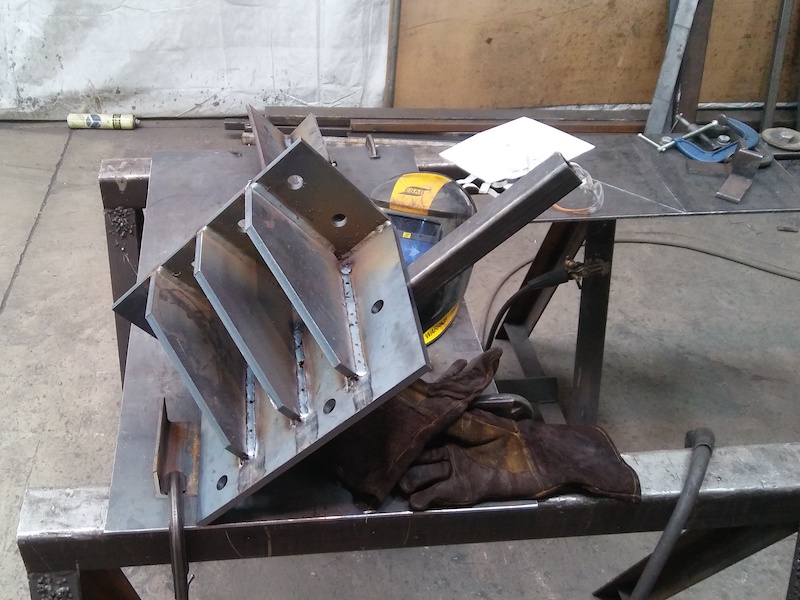
Welding components attached back-to-back means the tendencies to weld
distortion are exactly opposed by the other component. The weld
attempting to shrink in dimension during cooling will achieve most of
this by plastic deformation when well "locked" - of which back-to-back
is one method.
Leaving a small residue of elastic spring when the back-to-back fixing
bolts are released.
Bolting back-to-back adds to the production time per
right-angle-bracket. With the time spent fitting the bolts, then
tightening them with two spanners (on bolt-head and on nut).
That torque needs to be quite high, to resist the weld contraction
stresses. So that torquing is deliberate not quick.
The outcome - after releasing the nuts-and-bolts.
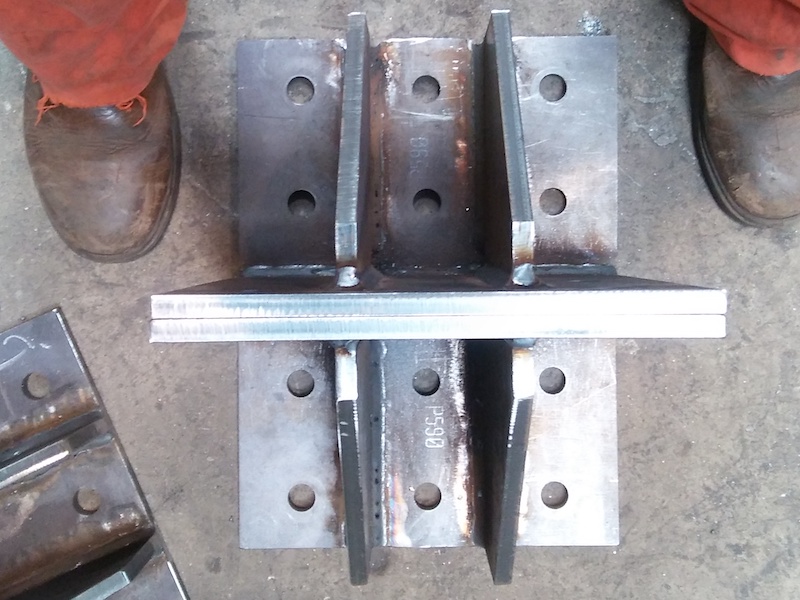
Very dimensionally accurate. Bracket surfaces very planar.
I put through this one back-to-backed pair then consulted with the factory management. Their verdict; "That's what we want. Do them like that."
(R. Smith, 16Mar2021, 18Mar2021 (edit))